How to Change the Filter on a Keurig - Step-by-Step Guide
Table of Contents
Master the Art of Replacing Your Keurig Water Filter for Optimal Coffee Taste #
Are you a coffee enthusiast, finding yourself yearning for that perfect, fresh brew every morning? What if we told you the secret to that sublime cup lies not only in the coffee you choose but also in how well you maintain your Keurig machine? More specifically, it’s all about knowing how to change the filter on a Keurig.
It’s early morning, and you’re ready for your much-needed coffee. But as the comforting aroma fills the room, your first sip is… disappointing. It lacks that crisp, full-bodied flavor you crave. Have you considered that your Keurig water filter might be the culprit?
Just as we need clean water to stay healthy, so does your Keurig. The filter’s job is to purify the water that goes into brewing your coffee. And like any good thing, it needs a little TLC to keep working at its best. Think of it as the heart of your coffee machine - keep it in good shape, and it’ll return the favor by providing the ultimate brew.
In this guide, we’re going to unravel the mystery of the water purifier for Keurig. We’ll delve into when and why it needs changing, and of course, provide a detailed, easy-to-follow tutorial on how to change the filter on Keurig. By the end of this post, you’ll not only understand the importance of a well-maintained filter but also become a pro at handling it.
Isn’t it time to experience the difference a fresh filter can make to your coffee? Let’s bring back the pleasure of a robust, flavorful brew to start your day on the right note. Ready to embark on this journey with us?
Why Your Keurig Water Filter Needs Regular Change #

The Essence of the Keurig’s Water Filter #
Let’s start with the basics. What role does the Keurig water filter play in your daily coffee ritual? Essentially, it’s a crucial component that ensures the water used in brewing your coffee is pure, free of any impurities that might affect the taste. It’s the silent hero, working behind the scenes to make sure your cup of joe is nothing short of perfection.
Impact on Coffee Taste and Machine Performance #
Now, imagine what happens when this filter is not in its prime. If not replaced regularly, the build-up of impurities can compromise your coffee’s flavor, giving it an off taste. But that’s not all. Regular filter changes are critical for your machine’s health as well. A clean filter means less strain on your Keurig, ensuring it delivers optimal performance and prolongs its lifespan.
The Ideal Frequency of Filter Changes #
So, how often should you consider changing the filter? It’s a question we often hear, and the answer is simpler than you might think. Keurig recommends changing your filter every two months or every 60 tank refills. Now, of course, this is just a guideline. If you’re a heavy coffee drinker, you may need to change it more frequently. On the other hand, if you only brew a cup or two per week, you might stretch it a bit longer.
Signs That Your Filter Needs a Change #
Still, wondering if it’s time to learn how to change the filter on Keurig? There are a few tell-tale signs that it’s time for a new filter. If your coffee tastes off or the machine takes longer to brew, it’s probably time to change the filter. Similarly, if you notice an increase in the sediment at the bottom of your cup, or if the ‘Descale’ light on your Keurig is constantly lit, these are clear signs your water purifier for Keurig needs a change.
In conclusion, the importance of regular filter changes can’t be overstated. It’s a simple, quick process that has a tremendous impact on the taste of your coffee and the longevity of your machine. So why not master the skill of how to change the filter on Keurig? Trust us, your taste buds and your Keurig will thank you.
Signs Indicating How to Change the Filter on a Keurig #
The Unusual Taste or Aroma #
One of the earliest signs indicating it’s time to discover how to change the filter on a Keurig is when you notice a difference in your coffee’s taste or aroma. If it starts to taste off or smells different, it could be because the filter is unable to effectively remove impurities from the water.
Long Brew Times #
Another common sign is an increase in brewing time. If your Keurig is taking longer than usual to brew a cup of coffee, it’s a clear indicator that the water is not flowing as smoothly as it should, which is often due to a clogged filter.
Sediment in Your Cup #
Finding sediment in your cup is a major sign that it’s time to change your Keurig water filter. If the filter is not working effectively, tiny particles may slip through and end up in your coffee. This is a clear signal that you need to look into how to change the filter on a Keurig.
‘Descale’ Light Is On #
The ‘Descale’ light on your Keurig is a smart feature designed to notify you when it’s time for a clean-up. If this light is constantly lit, it’s your machine’s way of telling you that it’s time to change the filter.
Frequency of Use #
Remember, the more frequently you use your Keurig, the more frequently you’ll need to change the filter. If you’re a heavy user, brewing several cups a day, you’ll likely need to change the filter more often than the recommended two months or 60 tank refills.
In conclusion, keeping an eye out for these signs will ensure that your Keurig continues to deliver that perfect cup of coffee every time. After all, mastering how to change the filter on Keurig isn’t just about maintaining your machine, but also about ensuring a great coffee experience.
Procuring the Right Keurig Water Filter for Replacement #
Understanding Your Keurig Model #
When thinking about how to change the filter on a Keurig, it’s crucial to start by understanding your Keurig model. The company produces a variety of coffee machines, each requiring a specific type of filter. Knowing the exact model you have will lead you to the correct filter.
Visiting the Official Keurig Website #
The official Keurig website is your one-stop destination for all things Keurig, including the right water purifier for Keurig. You’ll find filters for all models, guaranteeing compatibility.
Checking Retail and Online Stores #
Aside from the official website, many retail and online stores also sell Keurig filters. Ensure to verify their authenticity, as using non-genuine filters may impact your coffee’s taste and even damage your machine.
Identifying Genuine Keurig Water Filters #
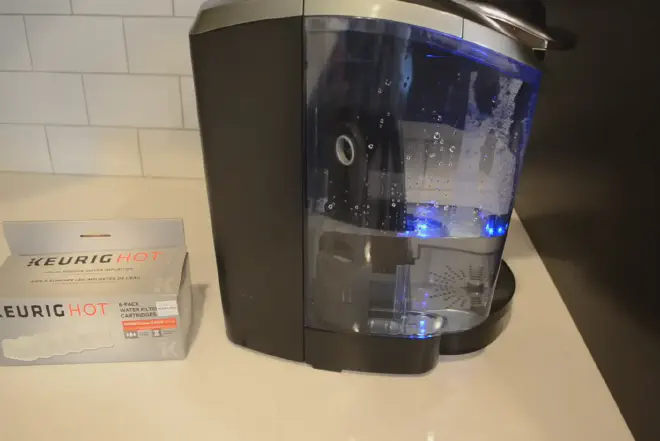
Understanding how to identify a genuine water purifier for Keurig is crucial. Genuine filters are often accompanied by a product manual, have the Keurig logo, and come in official Keurig packaging.
Procuring in Bulk for Future Needs #
If you’re a frequent user, it might be beneficial to procure Keurig filters in bulk. This way, you’re always prepared when it’s time to change the filter, and you often save a bit by buying in bulk.
So, when it’s time for a change, knowing how to change the filter on Keurig is only half the battle. Ensuring you procure the right replacement filter is equally important to maintain your machine’s functionality and the taste of your coffee. With these points in mind, you’re well on your way to mastering Keurig maintenance.
Step-by-Step Guide on How to Change the Filter on a Keurig #
Step 1: Preparing for the Process #
When you’re ready to understand how to change the filter on a Keurig, you’ll need to start by gathering your new Keurig’s water filter and ensuring your coffee machine is switched off and unplugged for safety.
Step 2: Accessing the Water Reservoir #
The water reservoir is where you’ll find the filter. It’s generally located on the machine’s side or back. Gently remove it to access the filter compartment.
Step 3: Removing the Old Filter #
Next in the process of changing the filter on a Keurig is removing the old filter. This usually involves opening the filter holder and pulling the old filter out. Remember, the old filter may still have water, so handle it over a sink or bowl.
Step 4: Preparing the New Filter #
Before inserting the new filter, you’ll need to soak it in water for about 5 minutes. This step is important as it removes any potential dust or charcoal residue that could affect your coffee’s taste.
Step 5: Inserting the New Filter #
Once the new filter is prepared, it’s time for the main event - how to change the filter on a Keurig. Insert the new filter into the filter holder and replace it back into the water reservoir.
Step 6: Reassembling Your Keurig #
With the new filter in place, reattach the water reservoir to your Keurig machine. Ensure it’s secure, refill it with fresh water, and you’re ready to brew!
Knowing how to change the filter on a Keurig is an essential skill for every Keurig owner. With these simple steps, you can ensure your machine continues to produce the high-quality coffee you know and love.
Tips to Prolong the Lifespan of Your Keurig’s Water Filter #
Use Filtered Water #
Although it might seem redundant, using filtered water in your Keurig can extend the life of the internal filter. This is because pre-filtered water has fewer impurities that the Keurig’s filter needs to remove. Thus, less strain is placed on the filter, reducing wear and tear.
Regular Cleaning #
Regular cleaning of your Keurig, even beyond knowing how to change the filter on a Keurig, can extend the overall life of the machine, including the filter. Regular maintenance, such as descaling, can prevent build-up that might otherwise clog or damage the filter over time.
Filter Rotation #
Try to rotate the water filter after every few brew cycles. This practice can help the filter to utilize its full surface area, thus ensuring it wears evenly and prolonging its useful life.
Timely Replacement #
Finally, even with the best care, water filters don’t last forever. Keurig recommends replacing your water filter every two months or 60 tank refills. Timely replacement is vital for both your machine’s efficiency and your coffee’s taste.
By following these tips, you’ll not only know how to change the filter on a Keurig but also how to extend its lifespan. A well-maintained filter will lead to a better performing machine and a more enjoyable cup of coffee. Let’s make sure we’re taking good care of our Keurigs, because nothing beats that morning cup of joe.
Troubleshooting Common Issues after Changing the Filter on a Keurig #
Improper Seating of the Filter #
One of the most common issues after changing a water purifier for Keurig is improper seating. If you experience problems with your machine, it may be due to the filter not being correctly placed. It’s crucial to ensure you know how to change the filter on a Keurig properly. You’ll want to make sure the filter is secure in the reservoir and that it’s aligned as stated in the instructions.
Slow Brew Time #
Another frequent problem is slow brew time. Sometimes, after changing the filter on your Keurig, the brewing process might become slower than usual. This can be due to air bubbles trapped in the filter during replacement. To remedy this, remove the filter, immerse it in water to let the bubbles escape, and then reinstall it.
Machine Not Brewing #
The Keurig not brewing is another problem that can crop up after a filter change. If you face this issue after changing the filter, it could be due to a clog. The new filter might have loosened some sediment, which has now blocked the machine’s system. A simple descaling could fix the problem.
Unpleasant Taste #
If the coffee has an unpleasant taste after changing the filter, you might need to prime the filter. Rinse the new filter under cold water for 5 minutes before installation. This process removes any dust or particles that could be affecting the coffee’s taste.
These are just a few of the potential problems you might face after learning how to change the filter on a Keurig. Fortunately, they’re all quite easy to address. If these troubleshooting tips don’t work, it might be best to consult the machine’s manual or contact Keurig customer service. Don’t let minor hurdles stop you from enjoying that perfect cup of coffee!
FAQs about Changing the Filter on a Keurig #
When should I change the filter on my Keurig? #
Most experts recommend changing the filter every two months or every 60 tank refills. However, this may vary depending on the quality of your water and the frequency of usage. If you notice any changes in the taste or output of your coffee, it might be a good indication to check the filter.
How do I know if my Keurig has a water filter? #
Not all Keurig models have a built-in water filter. Generally, if your model has a removable water reservoir, it’s likely to have a water filter. The best way to be sure is to check the user manual or the manufacturer’s website.
Do I have to use Keurig brand filters? #
While it’s recommended to use Keurig brand filters for the best fit and performance, it’s not a requirement. Many third-party brands produce compatible filters. However, ensure that the filter is specifically designed for your Keurig model to ensure proper operation.
Can I reuse my Keurig’s water filter? #
No, Keurig’s water filters are not designed for reuse. After a filter has reached its lifespan, it’s best to replace it with a new one to ensure your machine continues to function optimally and deliver the best-tasting coffee.
Does a Keurig work without a filter? #
Yes, your Keurig will work without a filter. However, the filter is responsible for removing impurities from the water, leading to better-tasting coffee. So, it’s best to use one if possible.
Is it hard to change the filter on a Keurig? #
No, changing the filter on a Keurig is a straightforward process. With the right instructions and a new filter, anyone can learn how to change the filter on a Keurig. It’s a simple step that can significantly enhance the taste of your coffee and the longevity of your machine.
We hope this FAQ section has provided answers to your questions about changing the filter on a Keurig. Happy brewing!
Conclusion: How to Change the Filter on a Keurig #
In conclusion, maintaining the lifespan and performance of your Keurig coffee maker heavily relies on a simple, yet essential step - changing the filter. We’ve explored why it’s necessary, how often it should be done, and most importantly, we’ve walked through a step-by-step guide on how to change the filter on a Keurig. Additionally, we’ve touched on how to prolong the lifespan of your Keurig’s water filter, how to troubleshoot common issues post filter-change, and answered some frequently asked questions.
If you’ve found this article helpful, we’d love to hear your feedback. Have you tried changing your Keurig filter following our guide? Did you experience any issues, or did you find it straightforward? Feel free to share your experiences and tips with our community in the comments section.
Don’t forget to share this article with your coffee-loving friends and colleagues - they might be looking for the same insights! Remember, a good cup of coffee starts with a well-maintained coffee machine. Happy brewing!